Wednesday, 30 November 2016

SBI Missed Call Balance Enquiry, SMS Banking

Missed Call Balance Enquiry Number SBI Quick: Missed Call & SMS Banking


We are pleased to introduce to you our latest 
offering that we are sure will simplify your day to day banking

SBI QUICK - MISSED CALL BANKING

You can now get your account balance, 
mini statement, information on loan 
products and block your ATM card just by sending an SMS  or giving a Missed Call!

It involves a onetime registration.

SMS, 'REGaccount number' to 09223488888 e.g. REG 12345678901 from the mobile number available in bank's records for that particular account. Facility


SMS Balance Enquiry

Missed Call or send an SMS 'BAL' to 09223766666
Mini Statement
Missed Call or send an  SMS 'MSTMT' to 09223866666


Blocking of ATM Card

Send a SMS 'BLOCKXXXX' to 567676
(XXXX represents last 4 digit of the card number).

Car/Home Loan Enquiry

SMS 'HOME' or 'CAR' to 09223588888.

Full List of Services

SMS 'HELP' to 09223588888

In addition, if you have an Android phone, you can download the SBI Quick app 
from the Google Play Store. 

That way you will not need to remember the various keywords and destination mobile numbers. Once installed, you don't need an internet connection to use the app as the communication would happen over SMS or Missed Call.
Warm regards,
Team SBI  


Disclaimer: State Bank never sends e-mails and embedded links asking you to update or verify confidential, personal and security details. If you receive such emails/phone calls/SMS, NEVER RESPOND to them and report such matter to the bank at report.phishing@sbi.co.in

Tuesday, 29 November 2016

How to Root Android Easy Metod with simple one click

 How to easily root an Android device;


                                              Easiest way to root your android


Thankfully, there's a utility that makes rooting a one-click affair: KingoRoot. It's free and it works -- though not with all devices. 

1,Tap on About Phone and find the Build Number
2,Tap on the Build Number seven times and the Developer Options will appear on the main page of the Settings
3,Tap on the Back key to see the Developer Options
4,Tap on Developer Options
5,Check to enable USB Debugging
6,Check to enable OEM Unlocking


The app version

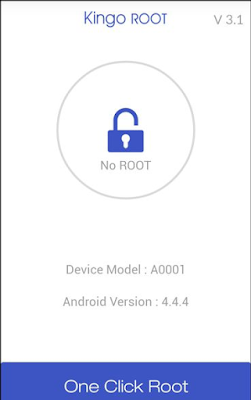
The easiest way to use KingoRoot is to install the app version, which literally performs the root process with just one tap.

Ideally, you'll just point your device's mobile to the KingoRoot Android page and download it directly. If that doesn't work for some reason, or you're working from your PC, download the APK and email it to yourself as an attachment. Then, on your device, open that e-mail and download that attachment.
To install it, however, you'll need to make sure your device is set to allow apps from unknown sources. In most versions of Android, that goes like this: Head to Settings, tap Security, scroll down to Unknown Sources and toggle the switch to the on position.
Now you can install KingoRoot. Then run the app, tap One Click Root,
and cross your fingers. If all goes well, your device should be rooted within about 60 seconds.


The desktop version

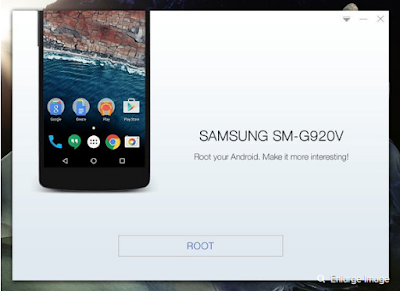
 I tried the Windows version of KingoRoot. Here's that process:

Step 1: Download and install KingoRoot for Windows, making sure to leave unchecked the option to "Install Yahoo powered Chromium browser" and then click Decline to prevent any other adware incursions.
No adware! Leave this box unchecked and be sure to click Decline during installation.

Step 2: Enable USB debugging mode on your phone. If it's running Android 4.0 or 4.1, tap Settings, Developer Options, then tick the box for "USB debugging." (You may need to switch "Developer options" to On before you can do so.) On Android 4.2, tap Settings, About Phone, Developer Options, and then tick USB debugging." Then tap OK to approve the setting change.
On Android 4.3 and later (including 5.0, though this also applies to some versions of 4.2), tap Settings, About Phone, then scroll down to Build Number. Tap it seven times, at which point you should see the message, "You are now a developer!"
With that done, tap Settings, About Phone, Developer Options, and then tick USB debugging." Then tap OK to approve the setting change.
Step 3: Run Android Root on your PC, then connect your phone via its USB sync cable. After a moment, the former should show a connection to the latter. Your device screen may show an "Allow USB debugging?" pop-up. Tick "Always allow from this computer," then tap OK.
Step 4: Click Root, then sit back and wait while the utility does its thing. After a few minutes,


And that's it. After successfully
Root your Android with kingo Root,

Friday, 25 November 2016

AdSense Address Verification With AdSense Pin ऐडसेंस पते का सत्यापन ऐडसेंस पिन के साथ

PIN verification is mandatory for Address Verification of your AdSense account. 

पिन सत्यापन अपने AdSense खाते का पता सत्यापन के लिए अनिवार्य है

       in india And some other countries

Are you struggling with the delivery of AdSense Pin? Unable to verify your AdSense account & receive your first $100 from AdSense? You are not alone, as AdSense users from many countries are facing the similar situation due to mailing issues.
If you are unsure of what I’m talking about, here it goes: AdSense sends you a Pin once you have earned your first $10 in your AdSense account. This AdSense pin is unique for every AdSense account & they send it via courier to the Address that you have mentioned while creating an AdSense account. Usually, AdSense sends your PIN by standard mail after few days of reaching the verification threshold.
 Here is the address verification threshold for various countries:
You’ll have four months from the date your first PIN is generated to enter it in your account. If you haven’t entered it after four months, AdSense will stop showing ads on your pages. Important things to know:


  • You have to wait for a week after your account balance reached verification threshold for a PIN to be generated and mailed to you

  • PINs often take up to 4 weeks to reach you by mail, though it may take longer depending on your location.

  • If you’ve not received your PIN after four weeks, you’ll need to request a new one. To find the date when you will be able to request a new PIN, log in to your account and view Account the Settings page under the Home tab.


  • How to request for a new AdSense pin:

    • Login to your AdSense account
    • Click on Gear icon at the top right & select settings.
    • In the left sidebar click on account information

  • Click the Verify Address link
  • Request for new AdSense pin at the bottom of the page;
  • Do remember: All the sent pins are duplicate of the first pin sent out to you. 
  • So even if you have received the first pin after requesting for a new one, 
  • you can use it to verify your address.