How to easily root an Android device;

Thankfully, there's a utility that makes rooting a one-click affair: KingoRoot. It's free and it works -- though not with all devices.
2,Tap on the Build Number seven times and the Developer Options will appear on the main page of the Settings
3,Tap on the Back key to see the Developer Options
4,Tap on Developer Options
5,Check to enable USB Debugging
6,Check to enable OEM Unlocking
The app version
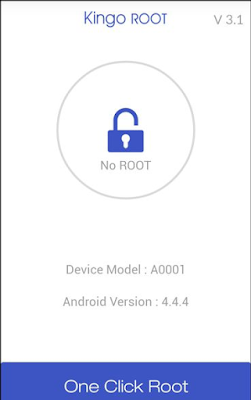
The easiest way to use KingoRoot is to install the app version, which literally performs the root process with just one tap.
Ideally, you'll just point your device's mobile to the KingoRoot Android page and download it directly. If that doesn't work for some reason, or you're working from your PC, download the APK and email it to yourself as an attachment. Then, on your device, open that e-mail and download that attachment.
To install it, however, you'll need to make sure your device is set to allow apps from unknown sources. In most versions of Android, that goes like this: Head to Settings, tap Security, scroll down to Unknown Sources and toggle the switch to the on position.
Now you can install KingoRoot. Then run the app, tap One Click Root,
and cross your fingers. If all goes well, your device should be rooted within about 60 seconds.
The desktop version
I tried the Windows version of KingoRoot. Here's that process:
Step 1: Download and install KingoRoot for Windows, making sure to leave unchecked the option to "Install Yahoo powered Chromium browser" and then click Decline to prevent any other adware incursions.
No adware! Leave this box unchecked and be sure to click Decline during installation.
Step 2: Enable USB debugging mode on your phone. If it's running Android 4.0 or 4.1, tap Settings, Developer Options, then tick the box for "USB debugging." (You may need to switch "Developer options" to On before you can do so.) On Android 4.2, tap Settings, About Phone, Developer Options, and then tick USB debugging." Then tap OK to approve the setting change.
On Android 4.3 and later (including 5.0, though this also applies to some versions of 4.2), tap Settings, About Phone, then scroll down to Build Number. Tap it seven times, at which point you should see the message, "You are now a developer!"
With that done, tap Settings, About Phone, Developer Options, and then tick USB debugging." Then tap OK to approve the setting change.
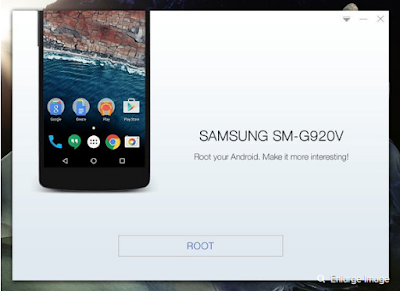
Step 3: Run Android Root on your PC, then connect your phone via its USB sync cable. After a moment, the former should show a connection to the latter. Your device screen may show an "Allow USB debugging?" pop-up. Tick "Always allow from this computer," then tap OK.
Step 4: Click Root, then sit back and wait while the utility does its thing. After a few minutes,
And that's it. After successfully
Root your Android with kingo Root,


No comments:
Post a Comment